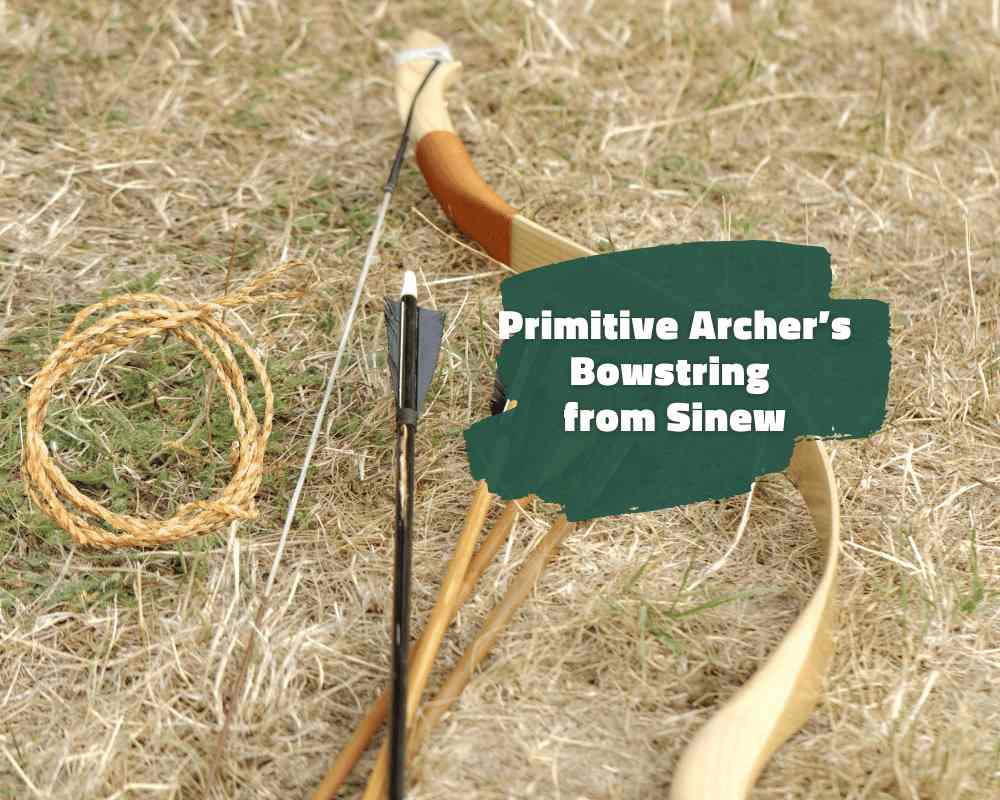
Primitive archery is the art of using traditional, handcrafted equipment to shoot arrows. It is a fascinating and rewarding skill that connects you with the history of hunting and survival.
Whether you’re a seasoned hunter or you’re a beginner looking for a new challenge, this guide will help you on your way with primitive archery: you’ll learn how to make a primitive archer’s bowstring out of naturally-sourced sinew.
Build a Bowstring with Sinew
Sinew is the strong, fibrous tissue found in the tendons and ligaments of animals, and it has been used for centuries to make bowstrings. Sinew is an excellent material for bowstrings because it has high tensile strength and elasticity, which is essential for transferring energy from a bow to an arrow. Here’s how to use sinew to make a bowstring!
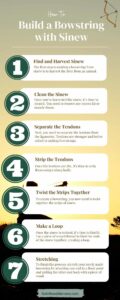
Step 1: Find and Harvest Sinew
The first step to making a bowstring from sinew is to harvest the fiber from an animal. The best animals to use for sinew are large game animals such as deer, elk, and moose, because they provide sinew that’s naturally long—ideal for a bowstring.
To harvest the sinew, remove the tendons and ligaments from the animal’s legs. Be sure to keep the tendons and ligaments separated, as they have different properties and will need to be processed differently.
Tip: You can also use smaller animals like rabbits or squirrels for sinew, but that would involve taking some extra, more complicated steps. You can learn about this in the next section on How to Get Sinew Long Enough for a Bowstring.
Step 2: Clean the Sinew
Once you’ve harvested the sinew, it’s time to clean it. You need to remove any excess fat or muscle tissue, and you can do so by scraping the sinew with a hunting knife or by soaking the sinew in warm water to soften the fat and muscle tissue, making it easier to scrape away.
After you’ve removed the excess tissue, soak the sinew in water for several hours or overnight. This will help to remove any remaining fat and dirt. Once the sinew has soaked, rinse it thoroughly with clean water.
Step 3: Separate the Tendons
Next, you need to separate the tendons from the ligaments. Tendons are the stronger of the two and so are better suited to making bowstrings. To separate the tendons, use a knife or scissors to cut them away from the ligaments.
Once you’ve separated the tendons, lay them out on a flat surface and allow them to dry for several hours.
Step 4: Strip the Tendons
Once the tendons are dry, it’s time to strip them. Use a sharpened hunting knife to slice the tendons lengthwise, cutting away the outer layer of tissue. Be careful not to cut too deeply or else you’ll damage the inner fibers.
After you’ve removed the outer layer, gently scrape away any remaining tissue with the back of your knife. You should be left with long, thin strips of sinew.
Step 5: Twist the Strips Together
To create a bowstring, you now need to twist together the strips of sinew. There are multiple different ways to do this; the method you choose will depend on the equipment you have and your skills:
The Drilling Method
For this method, you need a drill. Begin by taking two strips of sinew and tying them together at one end. Next, hold the untied end of the sinew in a vise grip or clamp. Once the sinew is secure, you can then use a cordless drill or hand drill to twist the sinew together, rotating the drill in a clockwise direction.
Tip: As you twist the sinew, be sure to apply even pressure to each strip; this will prevent one from becoming tighter than the other.
A drill constitutes the most efficient method for twisting sinew together, but isn’t always available or practical. Other methods include the thigh rolling method, hand rolling method, and reverse wrap method. Let’s look at them now!
The Thigh Rolling Method
The thigh rolling method involves using your thigh to roll the sinew until it’s twisted tightly. To achieve this, take a long piece of sinew and lay it over your thigh. Grasp one end of the sinew in each hand and begin rolling it back and forth along your thigh, applying firm pressure as you go. Continue rolling until the sinew is twisted tightly.
The Hand Rolling Method
Another method is the hand rolling method. This is similar to the thigh rolling method, but you have to use your hands instead of your thigh. Here’s how: Take a long piece of sinew and hold either end in each hand. Begin twisting the sinew by rolling it between your hands, applying firm pressure as you go. Continue rolling until the sinew is twisted tightly.
The Reverse Wrap Method
Lastly, the reverse wrap method involves wrapping the sinew around a stationary object, such as a tree or post, and then twisting it by hand. To achieve this, first tie one end of the sinew to a stationary object and hold the other end in your hand. Now start twisting the sinew by rolling it between your fingers, applying firm pressure as you go. As the sinew twists, wrap it around the stationary object in the opposite direction to prevent it from unraveling. Continue twisting and wrapping until the sinew is twisted tightly.
Tip: Whichever method you choose, you must make sure to keep twisting the sinew until it is very tight and compact. This will create a strong bowstring. You can test the tension of the sinew by pinching it between your fingers; it should feel strong and springy.
Step 6: Make a Loop
Once the sinew is twisted, it’s time to bind it. Use a piece of waxed thread to bind the ends of the sinew together, creating a loop. Be sure to wrap the thread tightly around the sinew to hold it in place. You’ve now made your bowstring!
Step 7: Stretching
To finish the process, stretch your newly made bowstring by attaching one end to a fixed point and pulling the other end back with a piece of wood. This will help to stretch the sinew and increase its elasticity.
How to Get Sinew Long Enough for a Bowstring
As mentioned previously, it’s easiest to use larger animals for primitive bowstrings as their sinew will be naturally longer, which is perfect for a bowstring. However, you may not be able to find larger animals or you may choose to stick with smaller ones. In this case, there are some extra steps you’ll need to take to make a long-enough bowstring. This section is here to help!
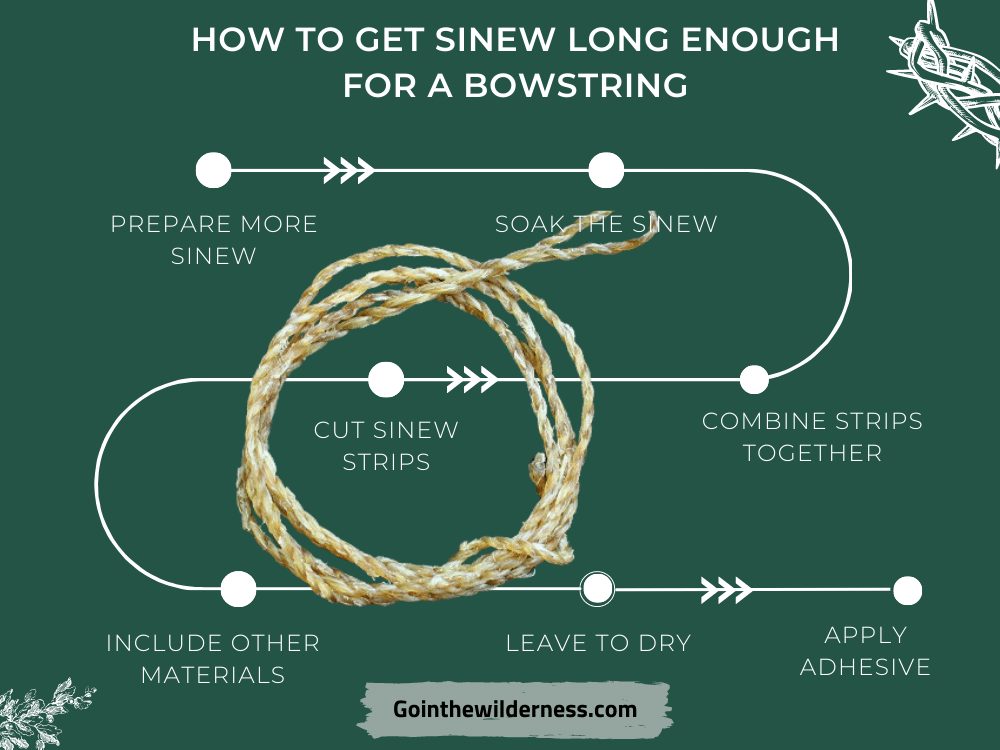
Step 1: Prepare More Sinew
If you’re using small animals, you’ll need to make an extra effort to source more sinew to make sure you have enough of it to make a bowstring. After that, follow Steps 1 and 2 of the previous section for harvesting and cleaning.
Step 2: Soak the Sinew
Next, soak the sinew for several hours so that it becomes soft and pliable. This step is vital for shorter pieces of sinew; it will soften them so you can then stretch them out better into a longer bowstring.
Step 3: Cut Sinew Strips
As per Steps 3 and 4 of the previous section, you now need to cut some strips of sinew. However small your animal, you need to cut the strips to as long a length as possible.
Step 4: Combine Strips Together
Now it’s time to combine your strips of sinew into one, long strip. You can combine them by weaving and twisting them together.
Tip: You can also combine strips sideways, not only lengthways, to create a thicker bowstring. The number of strands you use will depend on the length and strength you wish to achieve for your bow.
If you wish, you can also include other materials in your bowstring, such as plant fibers, animal gut, or rawhide. Proceed to the next step to find out more!
Step 5: Include Other Materials (Optional)
As you’re lengthening and strengthening the sinew for your bowstring, you can add twisted plant fibers such as flax or hemp, if you like. Another option is to use a combination of sinew and animal gut or rawhide.
Know that, while these techniques can be useful, including new materials will change the properties of your bowstring, e.g. how taut it gets and the way in which it fires arrows.
Tip: If you’re unsure, you can always turn it into a fun experiment. Try making different bowstrings out of different combinations of materials—and then test them to find out which combination(s) you prefer for firing arrows!
Step 6: Leave to Dry
After you’ve combined the sinew, you next need to give it time to dry in a warm, dry place. Only then, once the sinew has dried, you can finish your bowstring.
Step 7: Apply Adhesive
Now it’s time for the essential finishing touch to a bowstring made out of sinew from small animals. You need to coat the sinew with a layer of glue, which will protect it from moisture and damage!
For this, you can use a variety of natural adhesives—including pine pitch, hide glue, or beeswax. Simply apply a thin layer of adhesive to the sinew and give it time to dry.
Conclusion
Making a primitive archer’s bowstring from sinew is an essential skill for anyone interested in traditional hunting methods. The process involves harvesting sinew, cleaning it, separating the tendons from the ligaments, twisting the strips together, binding the ends together to create a loop, and stretching. The resulting bowstring is strong, elastic, and durable, making it an ideal material for transferring energy from a bow to an arrow.
Overall, this process requires patience, skill, and attention to detail, and it offers a unique opportunity to connect with nature and the history of hunting. By mastering the art of primitive bowstrings, you can become part of a proud tradition that has been passed down through generations.
I am Bruno. Navigating the urban rush by day, I find peace under the stars by night. Alongside my loyal companion and co-adventurer Lilith, we explore the balance between city life and nature’s embrace. Through writing and films, I delve into bushcraft and the wild’s allure.
GointheWilderness is my bridge between these two realms, guiding you to reconnect with your innate wilderness.
Eden is here and now; join us in rediscovering it.